一、ZipFile ZipFile类用于选择文件或文件夹进行压缩生成压缩包。
常用属性:
属性
说明
Count
文件数目(注意是在ComitUpdat之后才有)
Password
压缩包密码
Size
压缩包占用空间大小
Name
压缩包名称,默认输出是文件路径
ZipEntry
压缩包里的文件,通过索引[]访问
其常用方法如下:
方法
说明
Add
添加要进行压缩的文件
AddDirectory
添加文件夹(不会压缩文件夹里的文件)
Delete
删除文件或文件夹
BeginUpdate
开始修改压缩包
CommitUpdate
提交修改
SetComment
添加注释
示例1(创建压缩文件):
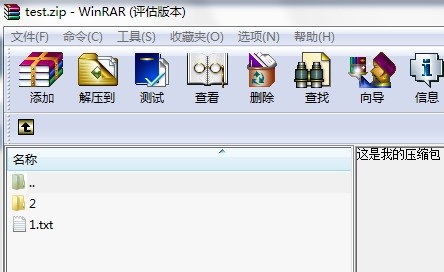
1
2
3
4
5
6
7
8
using (ZipFile zip = ZipFile.Create(@"D:\test.zip" )) { zip.BeginUpdate(); zip.SetComment("这是我的压缩包" ); zip.Add(@"D:\1.txt" ); zip.AddDirectory(@"D:\2" ); zip.Add(@"D:\2\2.txt" ); zip.CommitUpdate(); }
这样生成的压缩包是包含子文件夹,子文件夹也是包含子文件的。
其中,注释如下:
示例2:修改压缩包
1
2
3
4
5
6
using (ZipFile zip = new ZipFile(@"D:\test.zip" )) { zip.BeginUpdate(); zip.Add(@"D:\2.txt" ); zip.CommitUpdate(); }
留意这个示例和上面的有什么不同,上面的是Create方法创建的ZipFile对象,而这里是直接读。因此,如果压缩包里面有文件,则不会改动原来的压缩文件,而是往会里面添加一个。这样就相当于压缩包的修改,而上面是压缩包的创建。
示例3:读取压缩包里的文件:
1
2
3
4
5
6
7
8
9
using (ZipFile zip = new ZipFile(@"D:\test.zip" )) { foreach (ZipEntry z in zip) { Console.WriteLine(z); } ZipEntry z1 = zip[0 ]; Console.WriteLine(z1.Name); }
二、FastZip 这个类就两个方法:
方法
说明
CreateZip
压缩目录
ExtractZip
解压缩目录
1、FastZip用于快速压缩目录,示例如下:
1 2 (new FastZip()).CreateZip(@"D:\test.zip" , @"D:\test\", true, " ");
这个是递归压缩的。但是局限性就是只能压缩文件夹。
否则报如下错误:
2、快速解压缩目录
1 2 (new FastZip()).ExtractZip(@"D:\test.zip" , @"D:\解压目录\", " ");
三、ZipOutputStream与ZipEntry
ZipOutputStream:相当于一个压缩包;
ZipEntry:相当于压缩包里的一个文件;
以上两个类是SharpZipLib的主类,最耐玩的就是这两个类。
ZipOutputStream常用属性:
属性
说明
IsFinished
ZipOutputStream是否已结束
ZipOutputStream常用方法:
方法
说明
CloseEntry
关闭入口,关闭之后不允许再对ZipOutputStream进行操作
Finish
结束写入
GetLevel
读取压缩等级
PutNextEntry
往ZipOutputStream里写入一个ZipEntry
SetComment
压缩包的注释
SetLevel
设置压缩等级,等级越高文件越小
Write
写入文件内容
使用ZipOutputStream创建一个压缩包并往里面写入一个文件的示例:
1
2
3
4
5
6
7
8
9
10
11
12
13
14
15
16
17
18
19
20
21
22
23
static void Main (string [] args) { using (ZipOutputStream s = new ZipOutputStream(File.Create(@"D:\123.zip" ))) { s.SetLevel(6 ); { byte[] buffer = new byte[4 * 1024 ]; ZipEntry entry = new ZipEntry(Path.GetFileName(@"改名.txt" )); entry.DateTime = DateTime.Now; s.PutNextEntry(entry); int sourceBytes; do { sourceBytes = fs.Read(buffer, 0 , buffer.Length); s.Write(buffer, 0 , sourceBytes); } while (sourceBytes > 0 ); } s.CloseEntry(); } Console.ReadKey(); }
以上示例仅仅能够压缩文件,要压缩文件夹就要使用递归的方式,循环子目录并压缩子目录里的文件。
示例2:文件夹压缩,保持原文件夹架构:
1
2
3
4
5
6
7
8
9
10
11
12
13
14
15
16
17
18
19
20
21
22
23
24
25
26
27
28
29
30
31
32
33
34
35
36
37
38
39
40
41
42
43
44
45
46
47
48
49
50
51
52
class Program { static void Main (string [] args) { string Source = @"D:\test" ; string TartgetFile = @"D:\test.zip" ; Directory.CreateDirectory(Path.GetDirectoryName(TartgetFile)); using (ZipOutputStream s = new ZipOutputStream(File.Create(TartgetFile))) { s.SetLevel(6 ); Compress(Source, s); s.Finish(); s.Close(); } Console.ReadKey(); } public static void Compress (string source, ZipOutputStream s) { string [] filenames = Directory.GetFileSystemEntries(source); foreach (string file in filenames) { if (Directory.Exists(file)) { Compress(file, s); } else { using (FileStream fs = File.OpenRead(file)) { byte[] buffer = new byte[4 * 1024 ]; ZipEntry entry = new ZipEntry(file.Replace(Path.GetPathRoot(file),"" )); entry.DateTime = DateTime.Now; s.PutNextEntry(entry); int sourceBytes; do { sourceBytes = fs.Read(buffer, 0 , buffer.Length); s.Write(buffer, 0 , sourceBytes); } while (sourceBytes > 0 ); } } } } }
附上解压缩方法:
1 2 3 4 5 6 7 8 9 10 11 12 13 14 15 16 17 18 19 20 21 22 23 24 25 26 27 28 29 30 31 32 33 34 35 36 37 38 39 40 41 42 43 44 45 46 47 48 public bool Decompress (string sourceFile, string targetPath) { if (!File.Exists(sourceFile)) { throw new FileNotFoundException(string .Format("未能找到文件 '{0}' " , sourceFile)); } if (!Directory.Exists(targetPath)) { Directory.CreateDirectory(targetPath); } using (ZipInputStream s = new ZipInputStream(File.OpenRead(sourceFile))) { ZipEntry theEntry; while ((theEntry = s.GetNextEntry()) != null) { string directorName = Path.Combine(targetPath, Path.GetDirectoryName(theEntry.Name)); string fileName = Path.Combine(directorName, Path.GetFileName(theEntry.Name)); if (directorName.Length > 0 ) { Directory.CreateDirectory(directorName); } if (fileName != string .Empty) { using (FileStream streamWriter = File.Create(fileName)) { int size = 4096 ; byte[] data = new byte[ 4 * 1024 ]; while (true ) { size = s.Read(data, 0 , data.Length); if (size > 0 ) { streamWriter.Write(data, 0 , size); } else break ; } } } } } return true ; }
ZipEntry就没什么好说的了,都是一些属性,指示一下,实际用到的很少。


 微信
微信 支付宝
支付宝